China Top 10 How to Store Medical Samples Properly?

Time:2026-09-19 Author:Oliver
0%

Medical samples are not ordinary inventory. A tube of plasma, a swab, or a tissue block can hold irreplaceable diagnostic and research information. Yet its value can decline before testing begins. The European Federation of Clinical Chemistry and Laboratory Medicine reports that preanalytical problems may cause more than 60% of laboratory errors. Temperature, light, humidity, transport time, and repeated freeze-thaw cycles all matter. One overlooked detail can change a result.

The biobanking industry is expanding quickly. MarketsandMarkets estimates that the global biobanking market could grow from about USD 72 billion in 2023 to more than USD 92 billion by 2028. That growth increases the need for reliable storage systems, not just larger freezers. Biobank expert Jan-Eric Litton has stated, “A biobank is only as good as the quality of its samples.” This principle remains practical. A labeled cryovial at −80°C needs more than cold air. It needs a verified temperature log, controlled access, backup power, and documented handling steps.

This guide explains how to store medical samples properly across common laboratory settings. It covers sample identification, container selection, temperature ranges, monitoring, transport, and emergency response. In practice, a freezer alarm may sound at 2 a.m. Staff still need a clear decision path. Storage plans also require review, because one protocol may not suit serum, whole blood, RNA, or tissue. The difficult part is consistency. Perfect storage is rarely achieved. Reliable storage is built, checked, and improved.
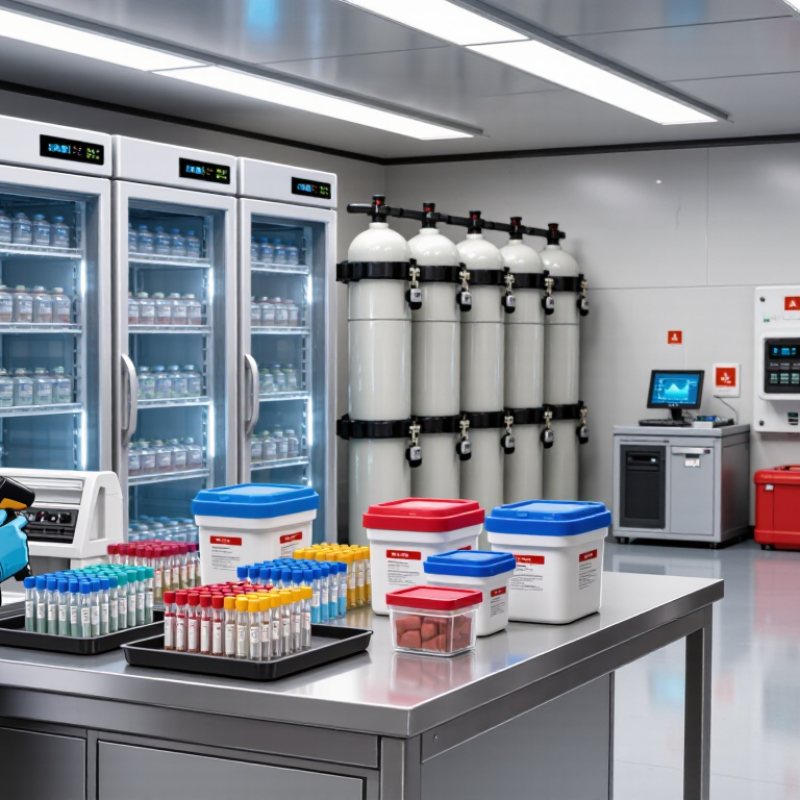
China Top 10 How to Store Medical Samples Properly?

Identify the Medical Sample Type and Its Storage Requirements

China Top 10 How to Store Medical Samples Properly?

Identify the medical sample before choosing its storage conditions. Blood, serum, plasma, urine, tissue, swabs, and cell samples can require different temperatures and containers. Check whether the sample needs refrigeration, freezing, protection from light, or a stabilizing solution. The collection time also matters because some materials degrade quickly. For example, a tissue sample may need prompt preservation, while a frozen specimen requires an uninterrupted cold chain. Review the laboratory procedure, sample label, and validated storage range together. Do not rely on memory.

Clear labeling prevents avoidable errors. Record the sample type, collection time, patient code, storage temperature, and responsible technician. Use leak-resistant containers and place samples upright when possible. Keep raw samples separate from chemicals and unrelated materials. A freezer display may show a normal temperature while samples warm during repeated door opening. This detail is easy to miss. Monitoring devices, alarm checks, and backup power add practical protection. Storage records should also show every transfer and temperature excursion.

Tips: Match each sample with a written storage requirement. Keep an inventory map near the storage unit. Avoid overcrowding shelves. Inspect seals and labels regularly. When a temperature rises unexpectedly, quarantine the affected samples and document the event. Do not guess whether they remain usable. Contact the responsible laboratory professional for a documented assessment. Some procedures may still need improvement, so review failures honestly and update the process.

China Top 10: Medical Sample Storage Temperature Requirements

Identify the sample type before storage. The chart shows commonly used temperature ranges in °C: chilled samples are generally maintained at 2–8°C, frozen samples require validated −20°C to −80°C storage, and fixed tissue is commonly kept at controlled room temperature. Always follow the approved laboratory protocol, specimen stability data, and test-specific requirements.

Select Suitable Containers, Labels, and Preservation Materials

China Top 10 How to Store Medical Samples Properly?

Select Suitable Containers, Labels, and Preservation Materials

Proper medical sample storage begins with the container. Choose sterile, leak-resistant tubes that match the specimen and test method. Blood, urine, tissue, and swab samples may require different materials. Some chemicals can react with plastic or weaken seals. Check compatibility before collection.

For frozen samples, use containers designed for low temperatures. Leave enough headspace to prevent cracking during freezing. Place absorbent material around primary containers during transport. Secondary packaging should remain closed if a tube breaks. Cold packs, dry ice substitutes, or controlled refrigeration must match the required temperature range. A temperature logger provides stronger evidence than a handwritten guess.

Labels need to survive moisture, cold, and handling. Record the unique sample code, specimen type, collection date, collection time, and storage condition. Add the operator’s initials when local procedures require them. Use clear, readable text, and place the label without covering the cap or inspection window. Double-check every label against the request form. Small errors become serious later. I have seen careful teams overlook this step during busy periods.

Preservation materials also need documented quality checks. Use approved stabilizing fluids, transport media, or preservatives only when validated for the intended analysis. Record lot details, preparation dates, and expiry dates. Keep samples separated by status and risk category. Review storage temperatures regularly. No system is flawless, so investigate damaged labels, temperature excursions, and unclear records instead of quietly correcting them.

China Top 10 How to Store Medical Samples Properly? - Select Suitable Containers, Labels, and Preservation Materials

Practical storage reference for commonly handled clinical specimens. Always follow the receiving laboratory’s validated procedure and the requirements of the requested test.

No. Medical Sample Suitable Container Essential Label Information Preservation Materials Typical Storage Temperature Recommended Holding Time Before Testing Important Storage and Transport Practices
1 Whole Blood for Hematology Leak-proof EDTA tube, usually containing K2EDTA or K3EDTA Patient name or identifier, collection date and time, specimen type, collector initials, requested test EDTA anticoagulant; insulated transport box with cold packs when required 2–8°C
Do not freeze
Preferably within 6–8 hours; generally within 24 hours for routine complete blood count testing Invert gently 8–10 times after collection. Do not shake. Inspect for clots, hemolysis, leakage, or insufficient volume.
2 Serum for Biochemistry and Serology Clot-activator tube or serum-separation tube with a secure screw or snap cap Patient identifier, collection and separation times, specimen type, requested analytes, collector initials Clot activator or separation gel; secondary leak-proof bag; cold packs for refrigerated transport 2–8°C
Freeze separated aliquots if long-term storage is validated
Allow clotting before centrifugation; test preferably within 24–48 hours when refrigerated Allow the specimen to clot according to the laboratory procedure, then separate serum promptly. Avoid repeated freeze–thaw cycles.
3 Citrate Plasma for Coagulation Testing Light-blue capped sodium citrate tube, filled to the stated mark Patient identifier, collection time, specimen type, anticoagulant, requested coagulation test Buffered sodium citrate, commonly 3.2%; temperature-controlled transport packaging 18–24°C
Do not refrigerate unless specifically validated
PT/INR: commonly within 24 hours; aPTT: commonly within 4 hours if unfrozen Maintain a 9:1 blood-to-anticoagulant ratio. Reject significantly underfilled or clotted tubes. Avoid pneumatic transport if prohibited by local validation.
4 Urine for Routine Analysis and Culture Sterile, wide-mouth, leak-proof polypropylene container Patient identifier, clean-catch or collection method, collection date and time, specimen type, requested test Refrigeration at 2–8°C; validated urine preservative tube may be used for selected testing 2–8°C
When testing is delayed
Preferably within 2 hours at room temperature; generally within 24 hours when refrigerated, according to test requirements Mix gently before aliquoting. Protect from contamination. Do not use a container with cleaning-agent residue or an unverified preservative.
5 Stool for Microbiology or Molecular Testing Sterile, wide-mouth, screw-cap, leak-proof stool container with an attached sampling spoon Patient identifier, collection date and time, specimen type, suspected test category, collector initials No additive for rapid testing; approved enteric transport medium for selected bacterial culture; molecular stabilizer only when test-validated 2–8°C
Unless the test method specifies otherwise
Transport promptly; commonly within 24 hours refrigerated, with some transport media allowing longer validated periods Prevent contact with urine, water, disinfectant, or toilet-cleaning chemicals. Keep the primary container upright inside a leak-proof secondary package.
6 Nasopharyngeal or Oropharyngeal Swab Synthetic-fiber swab with a plastic shaft in a sterile tube containing suitable viral or molecular transport medium Patient identifier, anatomical site, collection date and time, specimen type, requested assay Validated viral transport medium or molecular transport medium; cold packs for routine refrigerated transport 2–8°C
Freeze at approximately −70°C or below for longer storage when validated
Preferably within 72 hours when refrigerated, subject to the assay instructions Use synthetic rather than cotton or calcium alginate swabs when required by the assay. Keep the swab fully immersed and avoid transport-medium leakage.
7 Sputum or Lower Respiratory Tract Specimen Sterile, wide-mouth, screw-cap, leak-proof respiratory specimen container Patient identifier, collection date and time, specimen type, collection method, requested test No routine preservative; refrigerated transport with cold packs when immediate delivery is not possible 2–8°C
Do not freeze for routine bacterial culture unless validated
Preferably within 2 hours; generally within 24 hours when refrigerated for many routine culture workflows Collect a deep-cough specimen rather than saliva. Check specimen quality and reject obvious saliva when unsuitable for the requested examination.
8 Cerebrospinal Fluid (CSF) Sterile, low-binding, leak-proof polypropylene tube; separate tubes may be required for chemistry, microbiology, and cell count Patient identifier, collection time, tube number, anatomical source, requested test, collector information Usually no preservative; sterile transport container; validated stabilization medium only for specific molecular tests Room temperature
For many microbiology and cell-count examinations
Immediate delivery; process as soon as possible, preferably within 1 hour Treat as an urgent specimen. Do not refrigerate CSF intended for bacterial culture unless the laboratory specifically instructs it; follow test-specific requirements for viral or molecular testing.
9 Tissue Biopsy for Histopathology Wide-mouth, chemically resistant, leak-proof specimen jar with sufficient volume for the tissue Patient identifier, anatomical site and laterality, collection date and time, biopsy type, orientation details Neutral buffered formalin, commonly approximately 10% formalin solution; adequate fixative-to-tissue volume ratio 15–25°C
During fixation and transport
Place in fixative promptly; fixation commonly requires approximately 6–72 hours depending on tissue size and protocol Use a container at least several times larger than the tissue. Do not freeze tissue intended for routine histology. Handle formalin as a hazardous chemical.
10 DNA or RNA Specimen / Extract Sterile, nuclease-free, low-binding screw-cap microtube or cryovial with a secure seal Patient identifier or coded ID, specimen source, extraction date, concentration if measured, storage condition, aliquot number Validated nucleic-acid stabilization solution or nuclease-free buffer; dry ice or validated frozen transport for frozen material 2–8°C short term
−20°C or −80°C for longer storage, depending on analyte
Use validated stability data; minimize time at room temperature and repeated freeze–thaw cycles Aliquot into single-use portions. Use aerosol-resistant tips and a separate clean area to reduce contamination. Record every freeze–thaw event when required.
General requirements: Use two patient identifiers, write labels that remain legible under the storage condition, keep primary containers upright, place them in leak-proof secondary packaging, maintain a documented chain of custody, monitor temperature with calibrated devices, and follow applicable laboratory, biosafety, transport, and medical-waste procedures. Storage limits vary by analyte and method; the testing laboratory’s validated instructions take precedence.

Control Temperature, Humidity, Light, and Environmental Conditions

China Top 10 How to Store Medical Samples Properly?

Medical samples require controlled temperature, humidity, light, and cleanliness. Storage conditions must match the sample type and approved laboratory procedure. Refrigerated specimens often need 2–8°C, while frozen materials may require –20°C or lower. Never guess the range. A small temperature change can damage proteins, cells, or nucleic acids. Use calibrated data loggers, review readings daily, and record every alarm. Keep samples away from refrigerator doors when possible. Door movement causes repeated temperature changes.

Humidity also deserves attention. Excess moisture can damage labels, packaging, and sensitive equipment. Keep storage rooms dry, clean, and well ventilated. Use sealed secondary containers when condensation may occur. Protect light-sensitive samples with opaque tubes or covered racks. Avoid direct sunlight and strong cabinet lighting. Environmental control includes pest prevention, restricted access, backup power, and regular equipment maintenance. The room should remain orderly, with clear sample identification and separate areas for unused materials.

A cold room is not automatically safe. Poor labeling or overcrowded shelves can still cause loss. Leave space between containers so air can circulate. Check the center of the storage unit, not only the display screen. This detail is easy to miss. Review temperature and humidity trends, rather than reacting only to alarms. Procedures should be tested during power failures and equipment breakdowns. No system is perfect, and records may reveal weaknesses after an incident. That is why periodic review remains necessary.

Organize, Monitor, and Safely Transport Stored Medical Samples

China Top 10 How to Store Medical Samples Properly?

Proper storage begins with clear organization. Assign each medical sample a unique identification code, collection date, specimen type, and storage location. Use separate zones for different sample categories and risk levels. Keep an updated inventory, not a handwritten list alone. A misplaced tube can delay testing and weaken traceability.

Monitor storage conditions continuously. Record temperature, humidity, and equipment alarms at defined intervals. Place calibrated sensors near the warmest and coldest points, not only beside the door. Review readings daily and investigate every unexplained change. Samples should remain in sealed, labeled containers with enough space for airflow. Labels can still peel in condensation. Use secondary labels when appropriate, and check them during routine inspections.

Safe transport requires planning before the container leaves storage. Confirm the recipient, sample condition, packaging method, and required temperature range. Use leak-resistant primary containers, absorbent material, and a secure secondary container. Add a rigid outer package when handling could cause impact. Document each handover with time, condition, and responsible personnel. Temperature data should travel with the sample when stability depends on it. A cooling pack may touch a container too closely and freeze a sensitive specimen. That mistake is easy to miss. Staff should practice response procedures for delays, damaged packaging, alarm events, and uncertain sample identity, while following applicable laboratory and transport requirements.

Review Storage Duration, Access Procedures, and Disposal Standards

China Top 10 How to Store Medical Samples Properly?

Medical samples need a documented storage plan. The protocol should define temperature, container type, labeling, and retention time. Refrigerated samples often require continuous monitoring, while frozen materials need backup power and alarm checks. Record temperatures at scheduled intervals, not only when problems appear. Each label should show the sample code, collection date, expiry or review date, and hazard status. Avoid storing samples beyond the approved study period without documented authorization. A common weakness is unclear ownership after a project ends.

Access must be limited to trained, authorized personnel. Use a controlled key or electronic access system, and keep a complete movement log. The record should include the sample code, person, date, purpose, and return time. Store frequently used samples near the front to reduce door-opening time. Keep an access list under regular review. It should not remain unchanged for years. Two-person verification can reduce identification errors during transfer or retrieval.

Disposal requires an approved procedure and clear classification. Infectious materials, sharps, chemicals, and ordinary packaging may follow different routes. Confirm the retention period before disposal, then obtain documented approval from the responsible supervisor. Use sealed, labeled containers and an authorized waste process. Keep disposal records with dates, quantities, methods, and witnesses. Never place uncertain materials in regular trash or drains. Mistakes happen. A second review is worth the extra minute. Periodic audits should compare physical stock with digital records and investigate every mismatch.

FAQS

How should a laboratory identify a medical sample before storage?

Confirm whether it is blood, serum, plasma, urine, tissue, swab, or cells. Check the approved storage procedure and sample label. Record collection time, because some materials degrade quickly. Do not rely on memory.

What information should appear on a sample label?

Include the unique sample code, sample type, collection date, collection time, and storage condition. Add operator initials when required by local procedures. Use labels that withstand moisture, freezing, and handling. Small errors matter.

Which containers are suitable for medical samples?

Use sterile, leak-resistant containers that match the specimen and test method. Check whether chemicals could react with the container material. For frozen samples, choose containers designed for low temperatures. Leave headspace to reduce cracking during freezing.

What temperatures are commonly used for sample storage?

Refrigerated specimens often require 2–8°C. Frozen materials may require –20°C or lower. The correct range depends on the sample and validated procedure. Never guess the temperature.

How can temperature changes be monitored effectively?

Use calibrated data loggers and review readings regularly. Record alarms, transfers, and temperature excursions. Check conditions near the storage unit’s center, not only the display screen. Repeated door opening can warm samples.

How should light, humidity, and cleanliness be controlled?

Protect light-sensitive samples with opaque tubes or covered racks. Keep storage areas dry, clean, and well ventilated. Use sealed secondary containers when condensation may occur. Avoid direct sunlight and strong cabinet lighting.

What should happen after an unexpected temperature rise?

Quarantine the affected samples and document the event. Do not assume they remain usable. Ask the responsible laboratory professional for a documented assessment. The process may still need improvement.

How can storage areas reduce mix-ups and damage?

Keep an inventory map near the storage unit. Separate raw samples from chemicals and unrelated materials. Avoid overcrowded shelves, and leave space for air circulation. Inspect seals and labels regularly. Cold storage is not enough.

What records should support proper medical sample storage?

Records should show sample details, storage conditions, transfers, alarms, and temperature excursions. Document preservation material lots, preparation dates, and expiry dates. Review failures honestly instead of quietly correcting unclear records. No system is flawless.

Conclusion

How to store medical samples properly begins with identifying the sample type and understanding its specific preservation requirements. Different materials may require controlled temperatures, protection from light, stable humidity, or special handling to maintain their quality. Select clean, leak-resistant, and compatible containers, then add clear labels with essential details such as sample identity, collection time, and storage conditions. Appropriate preservation materials should be used when necessary to reduce contamination, degradation, or accidental mix-ups.

A reliable storage system should include organized placement, restricted access, routine condition checks, and documented monitoring of temperature, humidity, and other environmental factors. Samples should be transported in secure containers that maintain the required conditions and prevent damage. Storage duration, access procedures, and disposal standards should be reviewed regularly according to institutional policies and applicable requirements. Consistent documentation and careful staff training help protect sample integrity, support traceability, and promote a safe, efficient medical storage process.

Oliver

Oliver

Oliver is a seasoned marketing professional with a wealth of expertise in driving brand awareness and engagement. With a deep understanding of our company's product offerings, he consistently delivers high-quality content that enriches our professional blog. His insights not only shed light on......